 Itemlume
DIAGNOSTIC GUIDE / Product images
Can a polarizing filter remove glare without changing how my product surface looks?
Yes, but glare reduction is a trade-off, not proof of greater realism. A polarizing filter can make a surface easier to inspect, yet the angle may also suppress highlights that communicate gloss, coating, curvature, or finish. Photograph the same product from the same position with the filter at two angles, then approve the result against the physical item and supplier references.
Diagnose the surface before turning the filter
Identify what the glare hides: a white patch over a label and a narrow highlight along a curved glass bottle are different problems. Nikon describes polarizers as reducing glare from non-metallic surfaces such as glass and water; this is not a promise to remove all reflection from bare metal. If a highlight is clipped, retake the photograph rather than expecting a filter or editor to recover uncaptured print.
Also record which visual cues must remain. Gloss is not the same as glare: a controlled highlight can show that a finish is glossy, curved, metallic, or coated. A result with every highlight removed may look matte even when the product is not. The approval question is therefore not “Is the reflection gone?” but “Does the remaining surface evidence still agree with the real object?”
Run a paired, repeatable comparison
Make the comparison in one session. Keep the camera position, focal length, product orientation, focus, exposure approach, lighting, background, and distance unchanged. Take one reference frame without the filter, then record two filter positions that reduce the reflection to different degrees. Label the files with the angle or position used. This creates a reviewable record instead of relying on memory while editing.
Use external, manual editing only after the pair has been reviewed. Crop and color adjustments should preserve the product’s visible finish rather than hide a disagreement between frames. Photography, editing, and store publishing are separate workflows; neither Shopify guidance nor an Itemlume plan means Itemlume has connected editing or upload services.
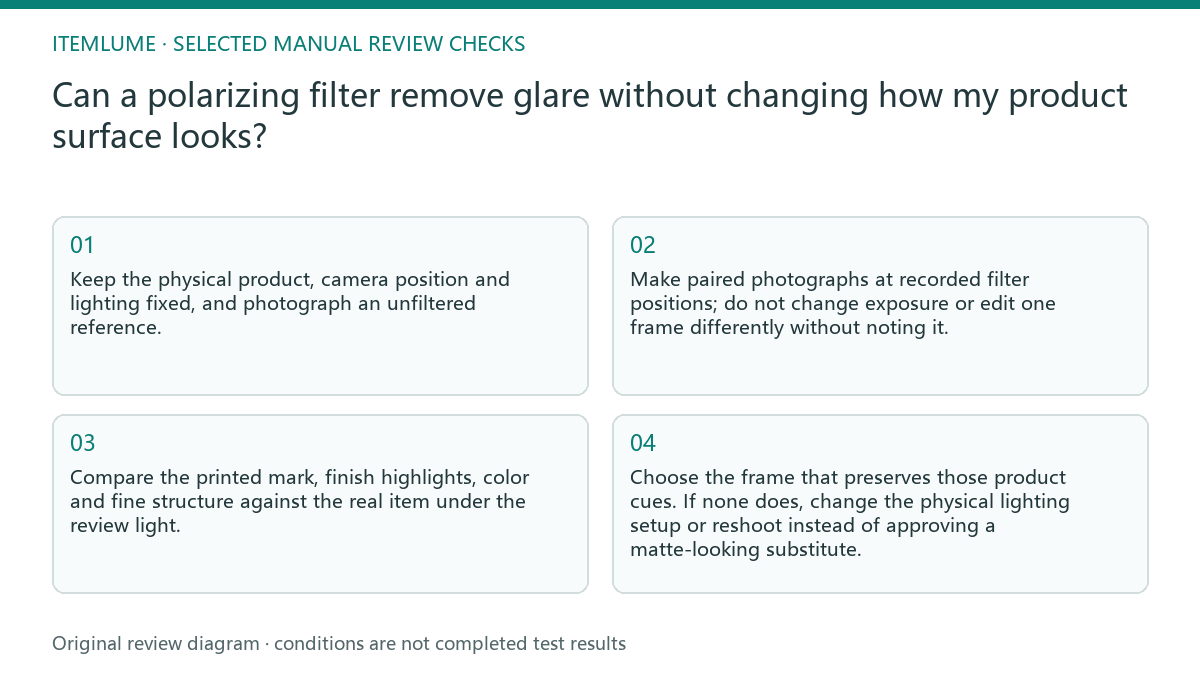
- Keep the physical product, camera position and lighting fixed, and photograph an unfiltered reference.
- Make paired photographs at recorded filter positions; do not change exposure or edit one frame differently without noting it.
- Compare the printed mark, finish highlights, color and fine structure against the real item under the review light.
- Choose the frame that preserves those product cues. If none does, change the physical lighting setup or reshoot instead of approving a matte-looking substitute.
Five-step surface acceptance test
1. Photograph the unfiltered reference and two filtered angles from the same setup.
2. Compare label legibility, edge shape, texture, color, and highlight width at the same display size.
3. Check the physical item beside the images, especially where gloss or coating is part of the product description.
4. Ask a second reviewer to identify which frame best represents the item without being told the filter setting.
5. Approve one frame only when the glare is reduced and no important surface cue has been erased; otherwise reshoot with changed light position, diffusion, or exposure rather than increasing polarization indefinitely.
Itemlume can help plan product text after sign-in at no charge, but the photography and editing work remains external and manual. Any chargeable image or video request has a separate quote. Do not treat a generated or edited visual as proof of material behavior, fit, color accuracy, or supplier approval.
Fictional worked example and stopping rule
Fictional example / 虚构示例: fictional product “Mira Ceramic Glaze Mug” was photographed with a bright window reflection crossing the blue glaze. The exact failure was that the reflection hid part of the printed mark, while the first strongly polarized frame made the glaze look flat. The owner changed one variable at a time: first the filter angle, then the window-side diffusion, while keeping the camera and mug position fixed.
At the first filter position, the mark became clearer but the curved highlight disappeared. At the second position, the mark remained readable and a narrow highlight returned, so the surface looked closer to the physical mug. The interpretation is not that the second frame is automatically true; it is only the better candidate because both identifying detail and glaze evidence survived. Stopping rule: stop testing when one paired frame passes the label, color, texture, edge, and gloss checks against the physical item. If no frame passes after the two recorded angles and one lighting adjustment, stop polarization testing and schedule a reshoot.
Polarizer comparison record
| Observation | What to check | Approval condition |
|---|---|---|
| White reflection over printed mark | Whether letters or marks remain continuous, not merely darker | Mark is readable and matches the physical item or approved reference |
| Broad highlight on glossy coating | Whether the coating still reads as glossy, curved, or layered | At least the relevant finish cue remains without a distracting blocked area |
| Color shift between angles | Whether hue, saturation, and neutral areas change with filter position | Selected frame agrees with the physical item under the review light |
| Edges and texture look softened | Whether fine relief, grain, seams, or contours were suppressed | Surface structure remains identifiable at the intended viewing size |
Use this matrix as a manual review record and add your own real evidence. Its conditions are not completed test results.
Sources and further reading
Sources for this page were checked on . Platform rules can change; verify the current source before publishing. Prompt examples and workflow recommendations are Itemlume editorial guidance, not independently measured results.
Frequently asked questions
Can I approve the darkest frame because it has the least glare?
No. Approve the frame that preserves required surface evidence, not the one with the smallest reflection.
Should I use one filter angle for every product?
No. Record two angles and judge each material, shape, and lighting setup separately.
Can an edited image prove that the item has the same finish?
No. Use the image for visual presentation and compare it with the physical item or authoritative supplier reference.
BUILD FROM A PRODUCT YOU KNOW
Put this workflow into practice with your own product.
Explore the relevant tool first. AI copy and concept planning are free after sign-in. Image and video generation require available credits and the applicable account access.
Open Product images Check pricing and credits