 Itemlume
DIAGNOSTIC GUIDE / Packaging studio
Why is there a thin white gap between two colors on printed packaging?
A white gap between printed colors can come from the artwork, a screen display artifact, or imperfect registration between ink plates. Compare the original file, PDF, and physical proof before adding a stroke. If trapping is needed, have the printer specify its treatment for the actual material and press rather than choosing a universal width.
Identify where the white line first appears
Look at the design file with relevant layers visible. If a genuine white object or empty space separates the colors, it is an artwork decision. If the line appears only in a PDF viewer and changes with zoom, investigate display or flattening before editing the production design.
A line on the physical proof deserves a different check: note its position, direction, and whether other plate boundaries show similar displacement. Photograph the proof and retain the supplied PDF. A phone photograph alone cannot establish trapping settings, but it can show the printer exactly which edge needs investigation.
Discuss registration and trapping with the printer
Adobe explains trapping as overlap that helps compensate when adjacent printed colors do not align perfectly. That principle does not determine the correct width for every paper, ink, substrate, or press. Ask the printer to examine the separation and recommend whether the issue needs artwork changes or production adjustment.
Do not cover the white gap with a random dark outline. That can change the approved design, thicken lettering, and introduce a visible border. Ask which object should spread or choke, what treatment is intended, and who owns the final production correction. Keep those instructions with the approved proof.
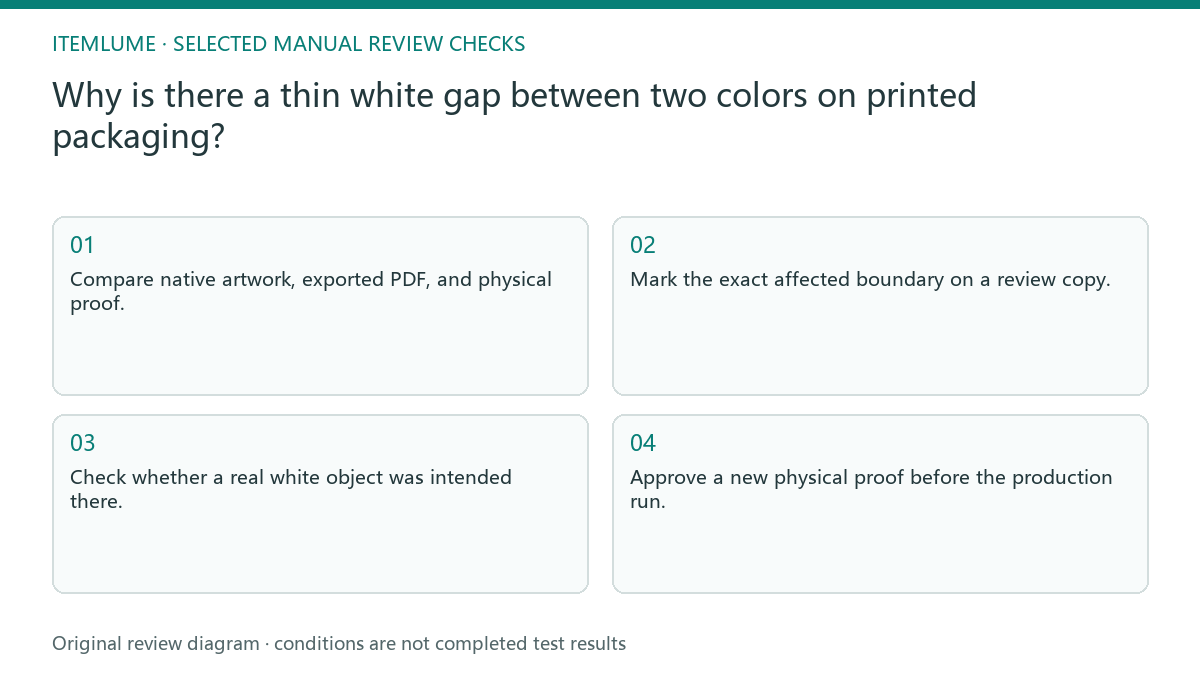
- Compare native artwork, exported PDF, and physical proof.
- Mark the exact affected boundary on a review copy.
- Check whether a real white object was intended there.
- Ask the printer to review registration and trapping requirements.
- Approve a new physical proof before the production run.
A fictional two-color carton
Fictional exercise: an amber panel touches a dark-blue panel on a small carton. The native design contains no white divider, while a physical proof shows a pale gap on one edge. The seller sends the proof and matching PDF to the printer, describing the location without prescribing an arbitrary trapping width.
The printer’s proposed correction becomes a separate proof version. Compare the color boundary and nearby type against the original approved layout. If the gap closes but the small text changes, do not approve automatically. This exercise has no real press result; acceptance requires the actual supplier’s proof and written treatment.
Keep concept approval separate from print approval
An Itemlume packaging concept can communicate composition, color blocks, and visual direction. It is not a printer-approved dieline or a verified separation file. A clean mockup cannot prove registration, total ink coverage, trapping, or substrate behavior in a production run.
Stop sending the same unmodified file when the same physical gap recurs. Resolve the responsible source with the printer, then record the corrected file name and proof approval. Do not hide the defect in campaign photos and call the package ready; the customer receives the physical print, not the mockup.
Locate the origin of the gap
| Where the line appears | Next evidence | Decision |
|---|---|---|
| Native design contains white | Inspect white shape or space | Confirm intentional design |
| PDF only; changes with zoom | Compare another rendering | Investigate display seam |
| Physical proof boundary displaced | Review plate alignment with printer | Printer specifies correction |
| Correction changes small type | Compare corrected physical proof | Hold approval until both pass |
Use this matrix as a manual review record and add your own real evidence. Its conditions are not completed test results.
Sources and further reading
Sources for this page were checked on . Platform rules can change; verify the current source before publishing. Prompt examples and workflow recommendations are Itemlume editorial guidance, not independently measured results.
Frequently asked questions
Is every white line a trapping problem?
No. It may be an intended gap or a display artifact. Identify the first stage where it appears.
Can I choose one trapping width for all packaging?
No. Ask the production supplier for the actual material and process requirements rather than reusing an arbitrary number.
Does a good mockup prove print readiness?
No. Approve the supplier’s production files and physical proof separately from the visual concept.
BUILD FROM A PRODUCT YOU KNOW
Put this workflow into practice with your own product.
Explore the relevant tool first. AI copy and concept planning are free after sign-in. Image and video generation require available credits and the applicable account access.
Open Packaging studio Check pricing and credits